
With most corsa models, it can be removed and the moving parts cleaned with carb cleaner and lubricated with wd40 to get it working again. However, with models like the 1.0 12V, it is an enclosed unit, and when a fault occurs, it's usually inside. and would need to be replaced. However, it is actually the contacts to the motor itself which usually are the problem - you seem to find on older ones develop rust on the contacts so no signal can pass through them. It's usually possible to open the unit and clean the contacts to get it working again.
Whichever model of Corsa you own though, if it is the motor itself that has burnt out (maybe by becoming dirty and being stuck in one position for too long) or the wiring to the unit is damaged, then cleaning will obviously make no difference. A lot of the time however it is just dirty contacts that cause the problem.
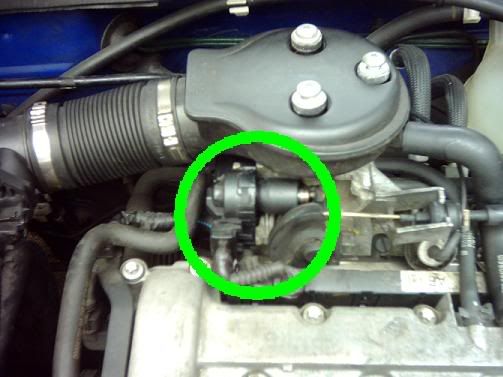
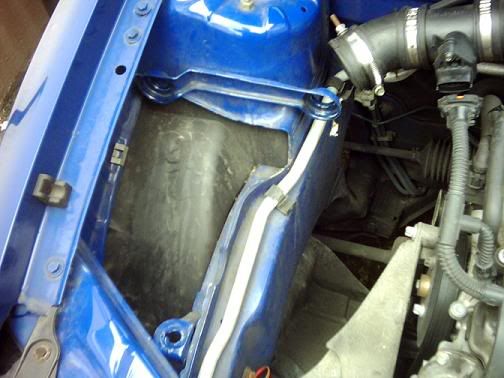
1) The idle control valve is located on the left-hand side of the throttle body, under the air intake tube.
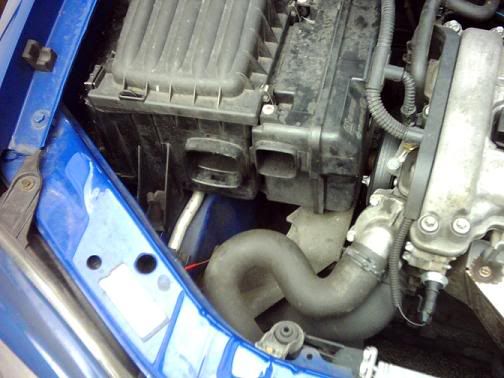
2) Before you start, you'll probably want to disconnect the negative terminal on the battery - you'll need to leave it like that for an hour to reset the ECU, so now would be a good time to start. You don't have to remove all of the air intake piping and the air filter box to get to the ICV, but it's quite hard to get to all of the bolts with them in the way. So, remove the front air intake tube
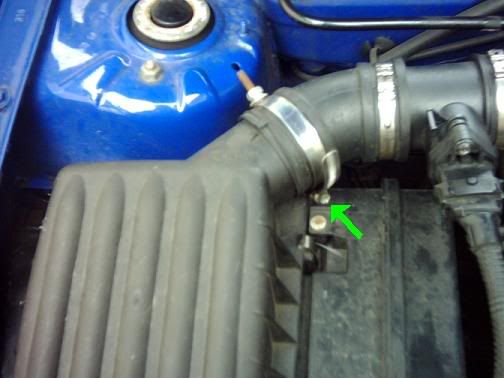
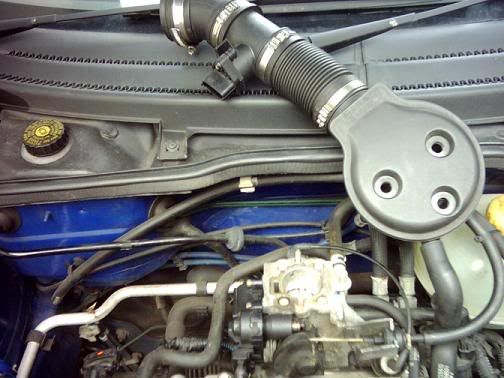
3) Loosen this screw and unplug the MAF and remove the airbox
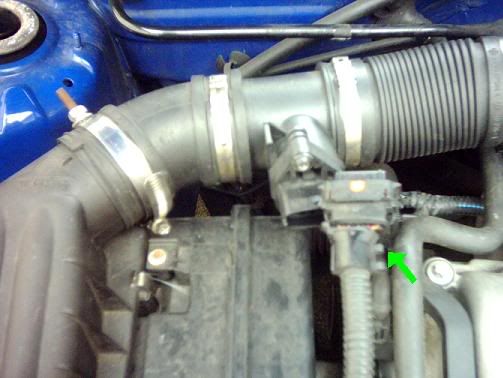
4) Undo the three torx bolts joining the air intake housing to the throttle body Unclip the pipe attached to the bottom of it, and then move it out of the way
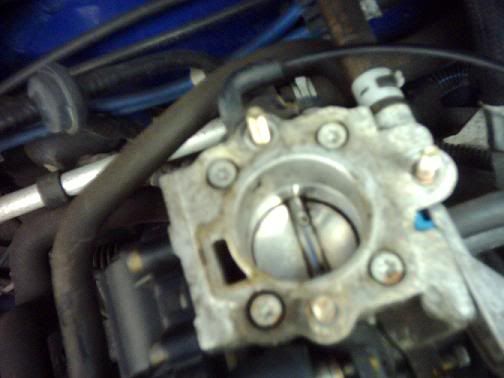
5) While you're here, if you haven't cleaned the throttle body before (or recently), now would be a good time. A dirty throttle body can also cause a lot of idle problems, including low idle and repeated stalling. Grab some carb cleaner and a toothbrush (an old one, not the one you use every morning...) and give it a good clean, opening up the throttle to get inside, then wash it down with some more carb cleaner
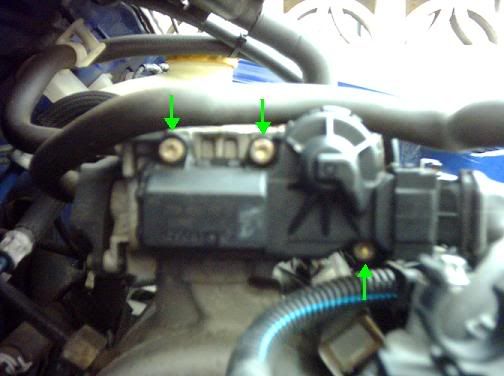
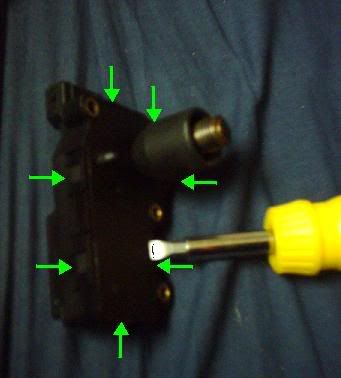
6) Back to the ICV. Use a screwdriver to pry off the metal clip on the connector plug, then pull the plug off the unit
Then it's just a case of removing the three torx bolts

07) So here's our allegedly "unfixable" ICV. Let's do something about that. First, clean the moving part (the bit with the spring around it) with carb cleaner, wipe it off gently and lubricate it with a bit of wd40
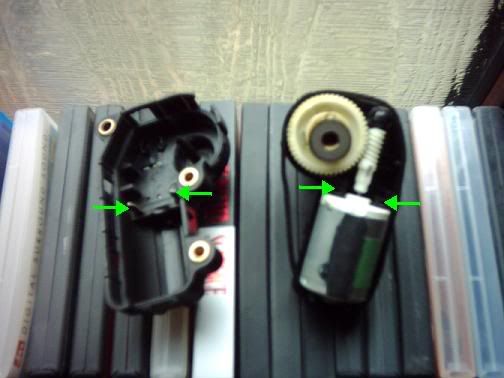
The unit has two sections, with the lower half sitting inside the upper half, held in by clips around the edge. Take a screwdriver and prise it out, clip by clip, taking care not to snap the plastic there are 7 in total
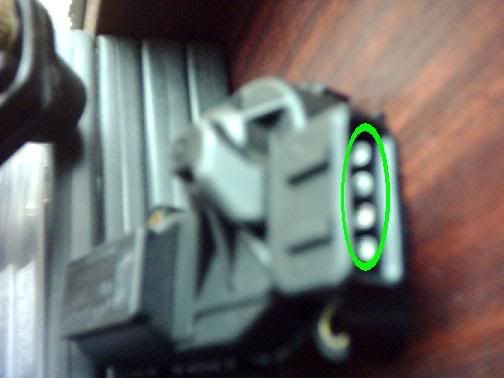
08) Now we have it open, you can see just how much Vauxhall are overcharging for this. One stepper motor and a couple of cogs - it looks like the inside of a toy. Anyway, you should now see the contacts that usually cause all the problems. The ones you'll want to focus on are the two spikey ones (on the left in the photo). The contacts on the motor are copper and shouldn't have as much of a layer on them, but clean them anyway. Carefully look at how the pieces fit together - it is the outer edges of the "spikes" that press against the inner sides of the copper motor contacts. It is these outer edges that you want to clean. Take some wet and dry paper, and get to work removing that oxide layer from the spikes. To get an idea of how long it takes to remove the layer, try it first on one of the sides of the spikes that you can see, then move to the outer edges. You will need to use a very small piece of paper because you will be sanding the side nearest the wall of the unit housing. Once you can see metal again under the light rather than a dull white layer, soak a tiny bit of cloth in some methylated spirit (or something similar) and give the contacts a clean.
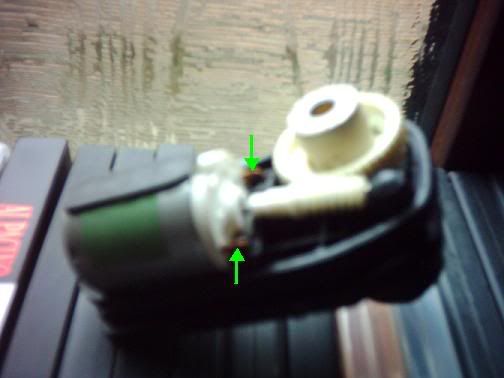
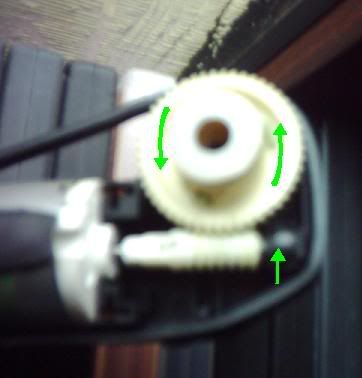
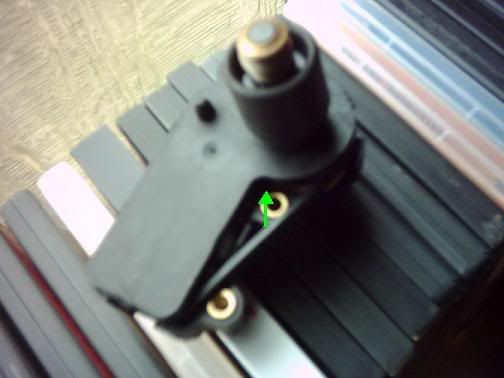
09) Use your screwdriver to pry out the motor, first at one end, then (carefully) at the ball joint. You will now have access to the motor contacts described above. Remember, it is the inner sides of these that are important. You probably won't need to sand these - just give them a good clean (with methylated spirit or similar). Once the ball-joint end is lifted, the main cog will be free to turn. Rotate it anti-clockwise until it stops. This will pull the moving spring part all the way in to its initial position, ready to be set up by the ECU once it's been reset
10) Clip the motor back in (holding the cog in place while you do), then repeat the process of sanding and cleaning for the plug contacts on the unit housing
When re-assembling the unit, the rubber ring that stretches around the inside edge will stop it from just clipping back together easily. So push it in at the corner And hold it there while you press the halves back together
And that's it! Put the unit back in the car, reversing the earlier steps in the tutorial. Before you start the car again, to stop the motor adjusting wrongly the ECU needs to be reset. To do this, disconnect the car battery negative terminal for an hour if you didn't do so earlier. When you reconnect it, start the car and don't rev it - just let it idle for a few minutes and set up the ECU. You'll know if the ICV is working if it moves, or if you can't see it, if you hear the idle speed changing.
If you make any mistakes and the ICV positions itself wrongly, remove it, open it and follow the steps to rotate the cog back to the start position again, then reset the ECU and try again. If after this the ICV still does not respond, try swapping it with one from a friend's car or one purchased cheap from a scrapyard. If it works, your original ICV is burnt out. If not, then you have a problem further down the line, like in the wiring or the plug.